
Set Custom Domains Through Seed
In the main part of our guide, we used SST to configure custom domains for our serverless app. But if you are using Serverless Framework or want to manage custom domains centrally, Seed gives you another option.
Let’s look at how.
We are still using the same custom domain that we purchased back in the Purchase a Domain with Route 53 chapter.
Add Custom Domain on Seed
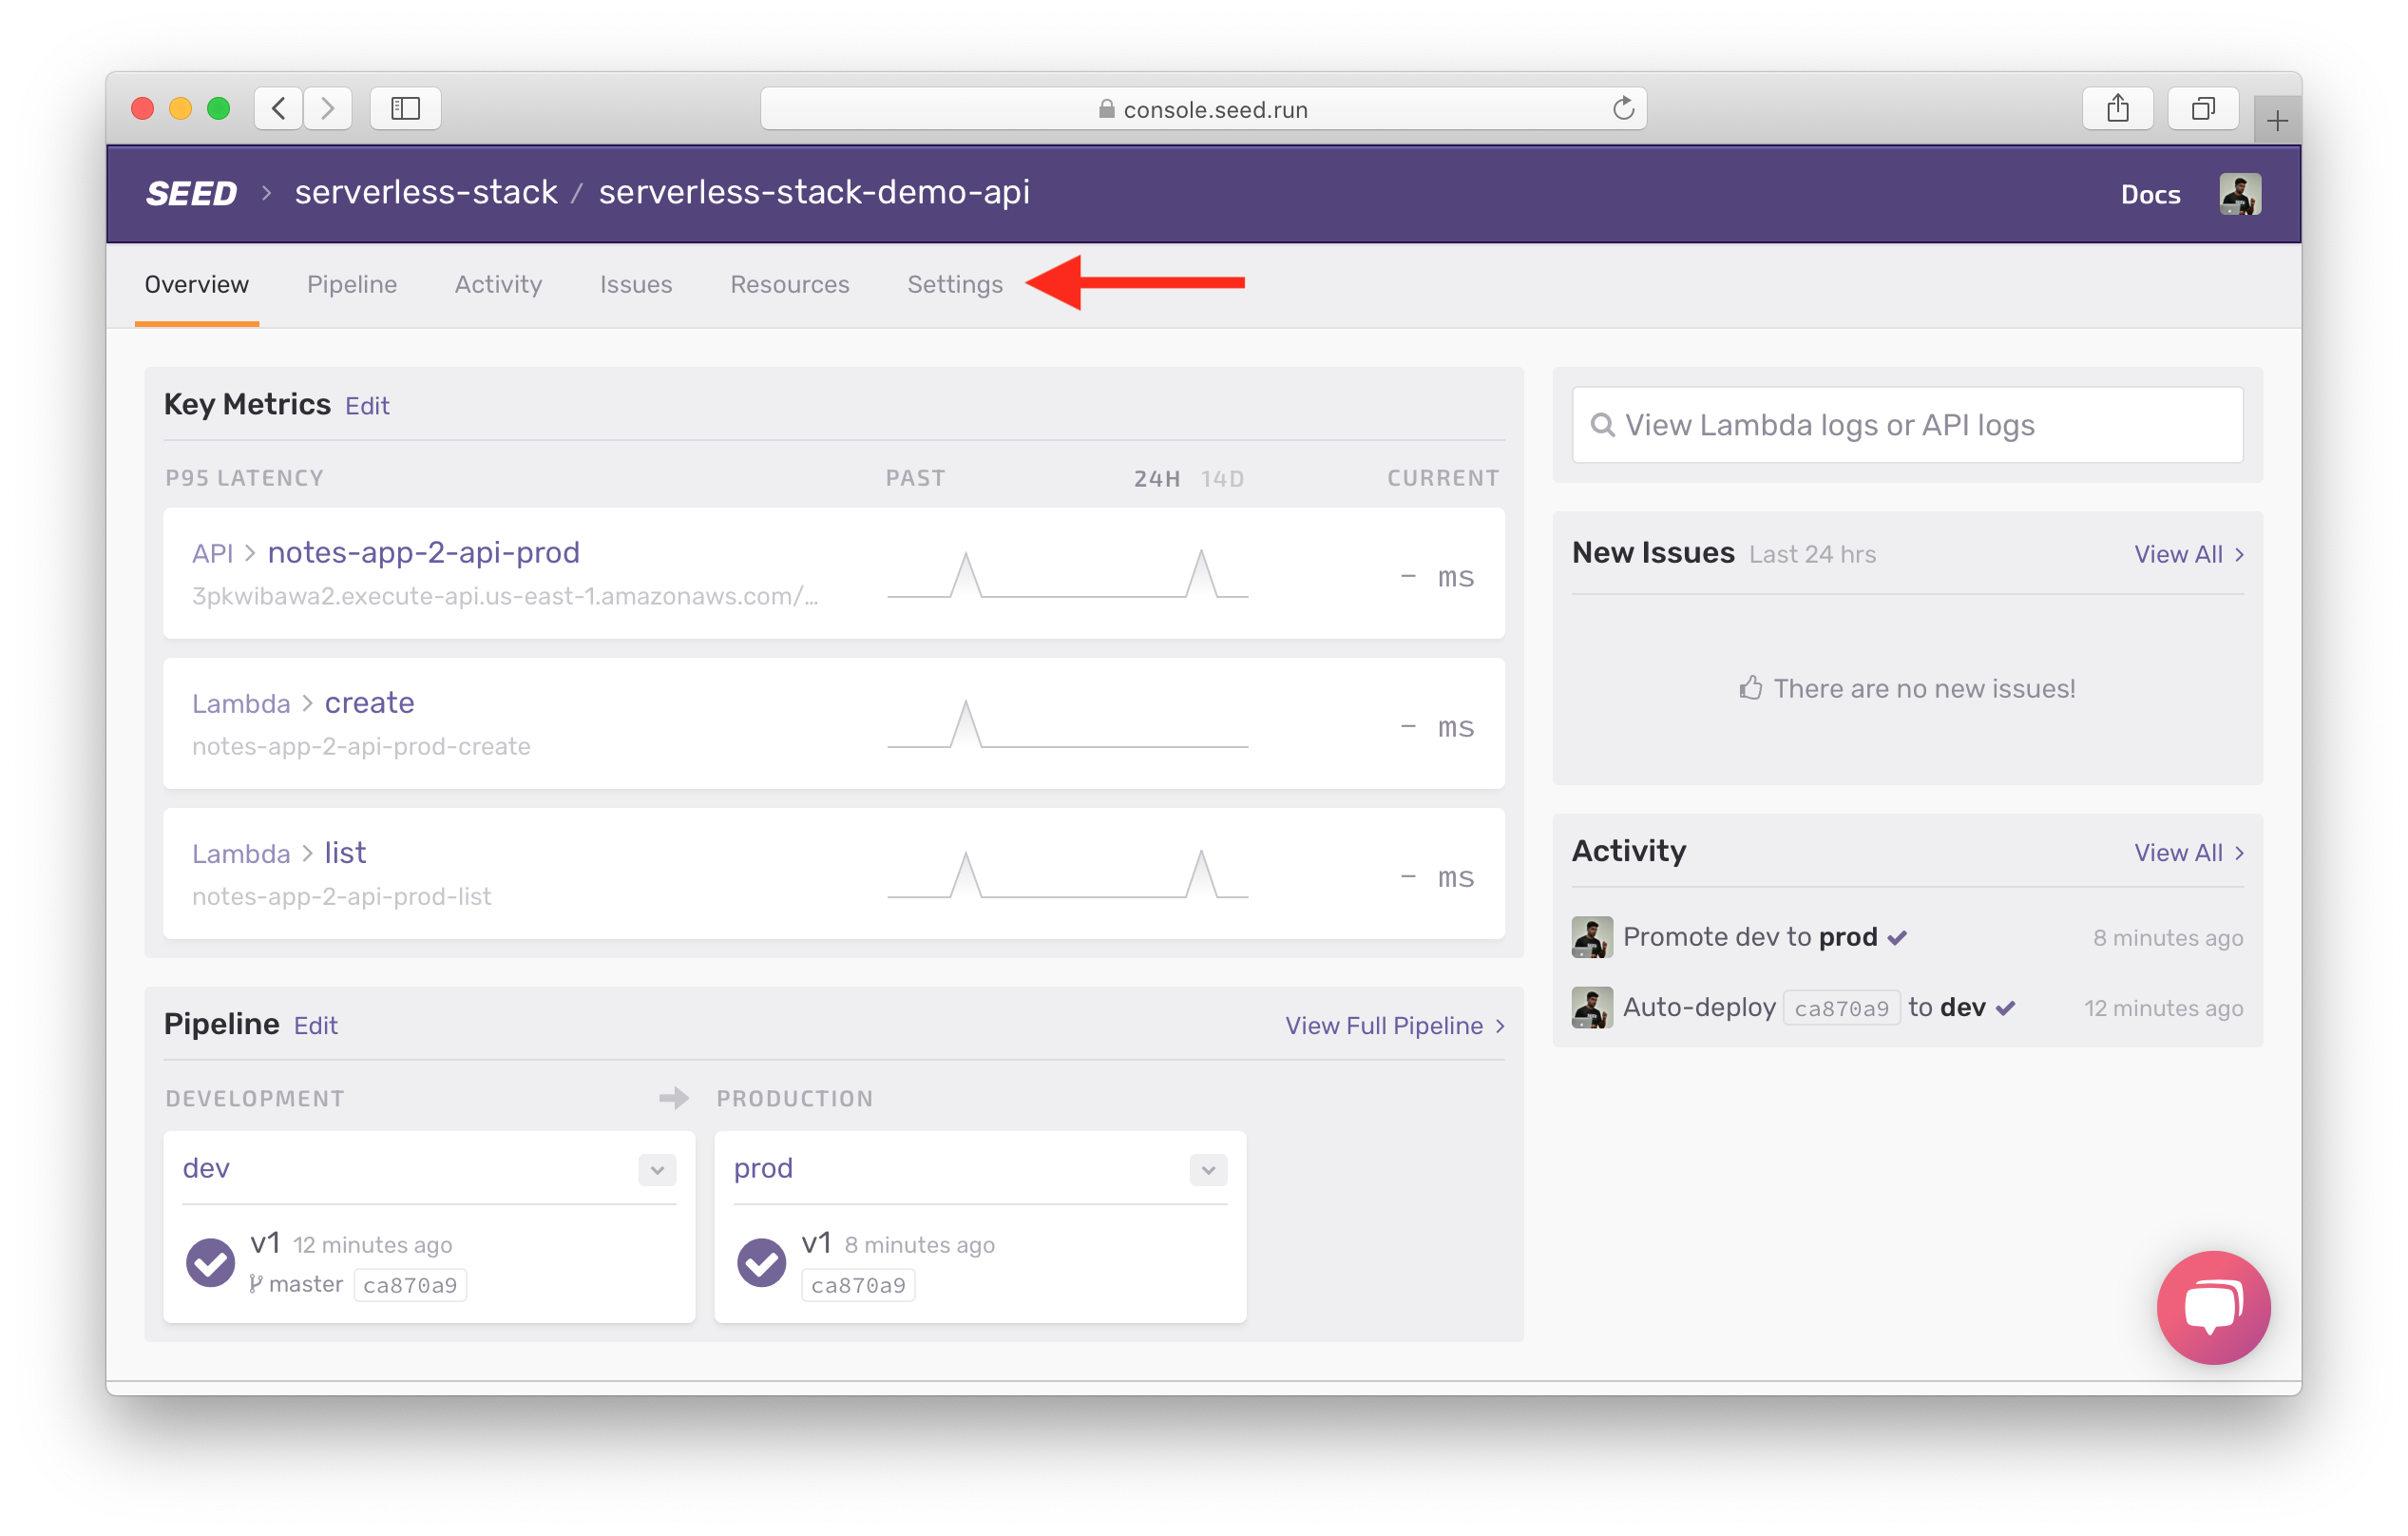
Head over to our app settings in Seed.
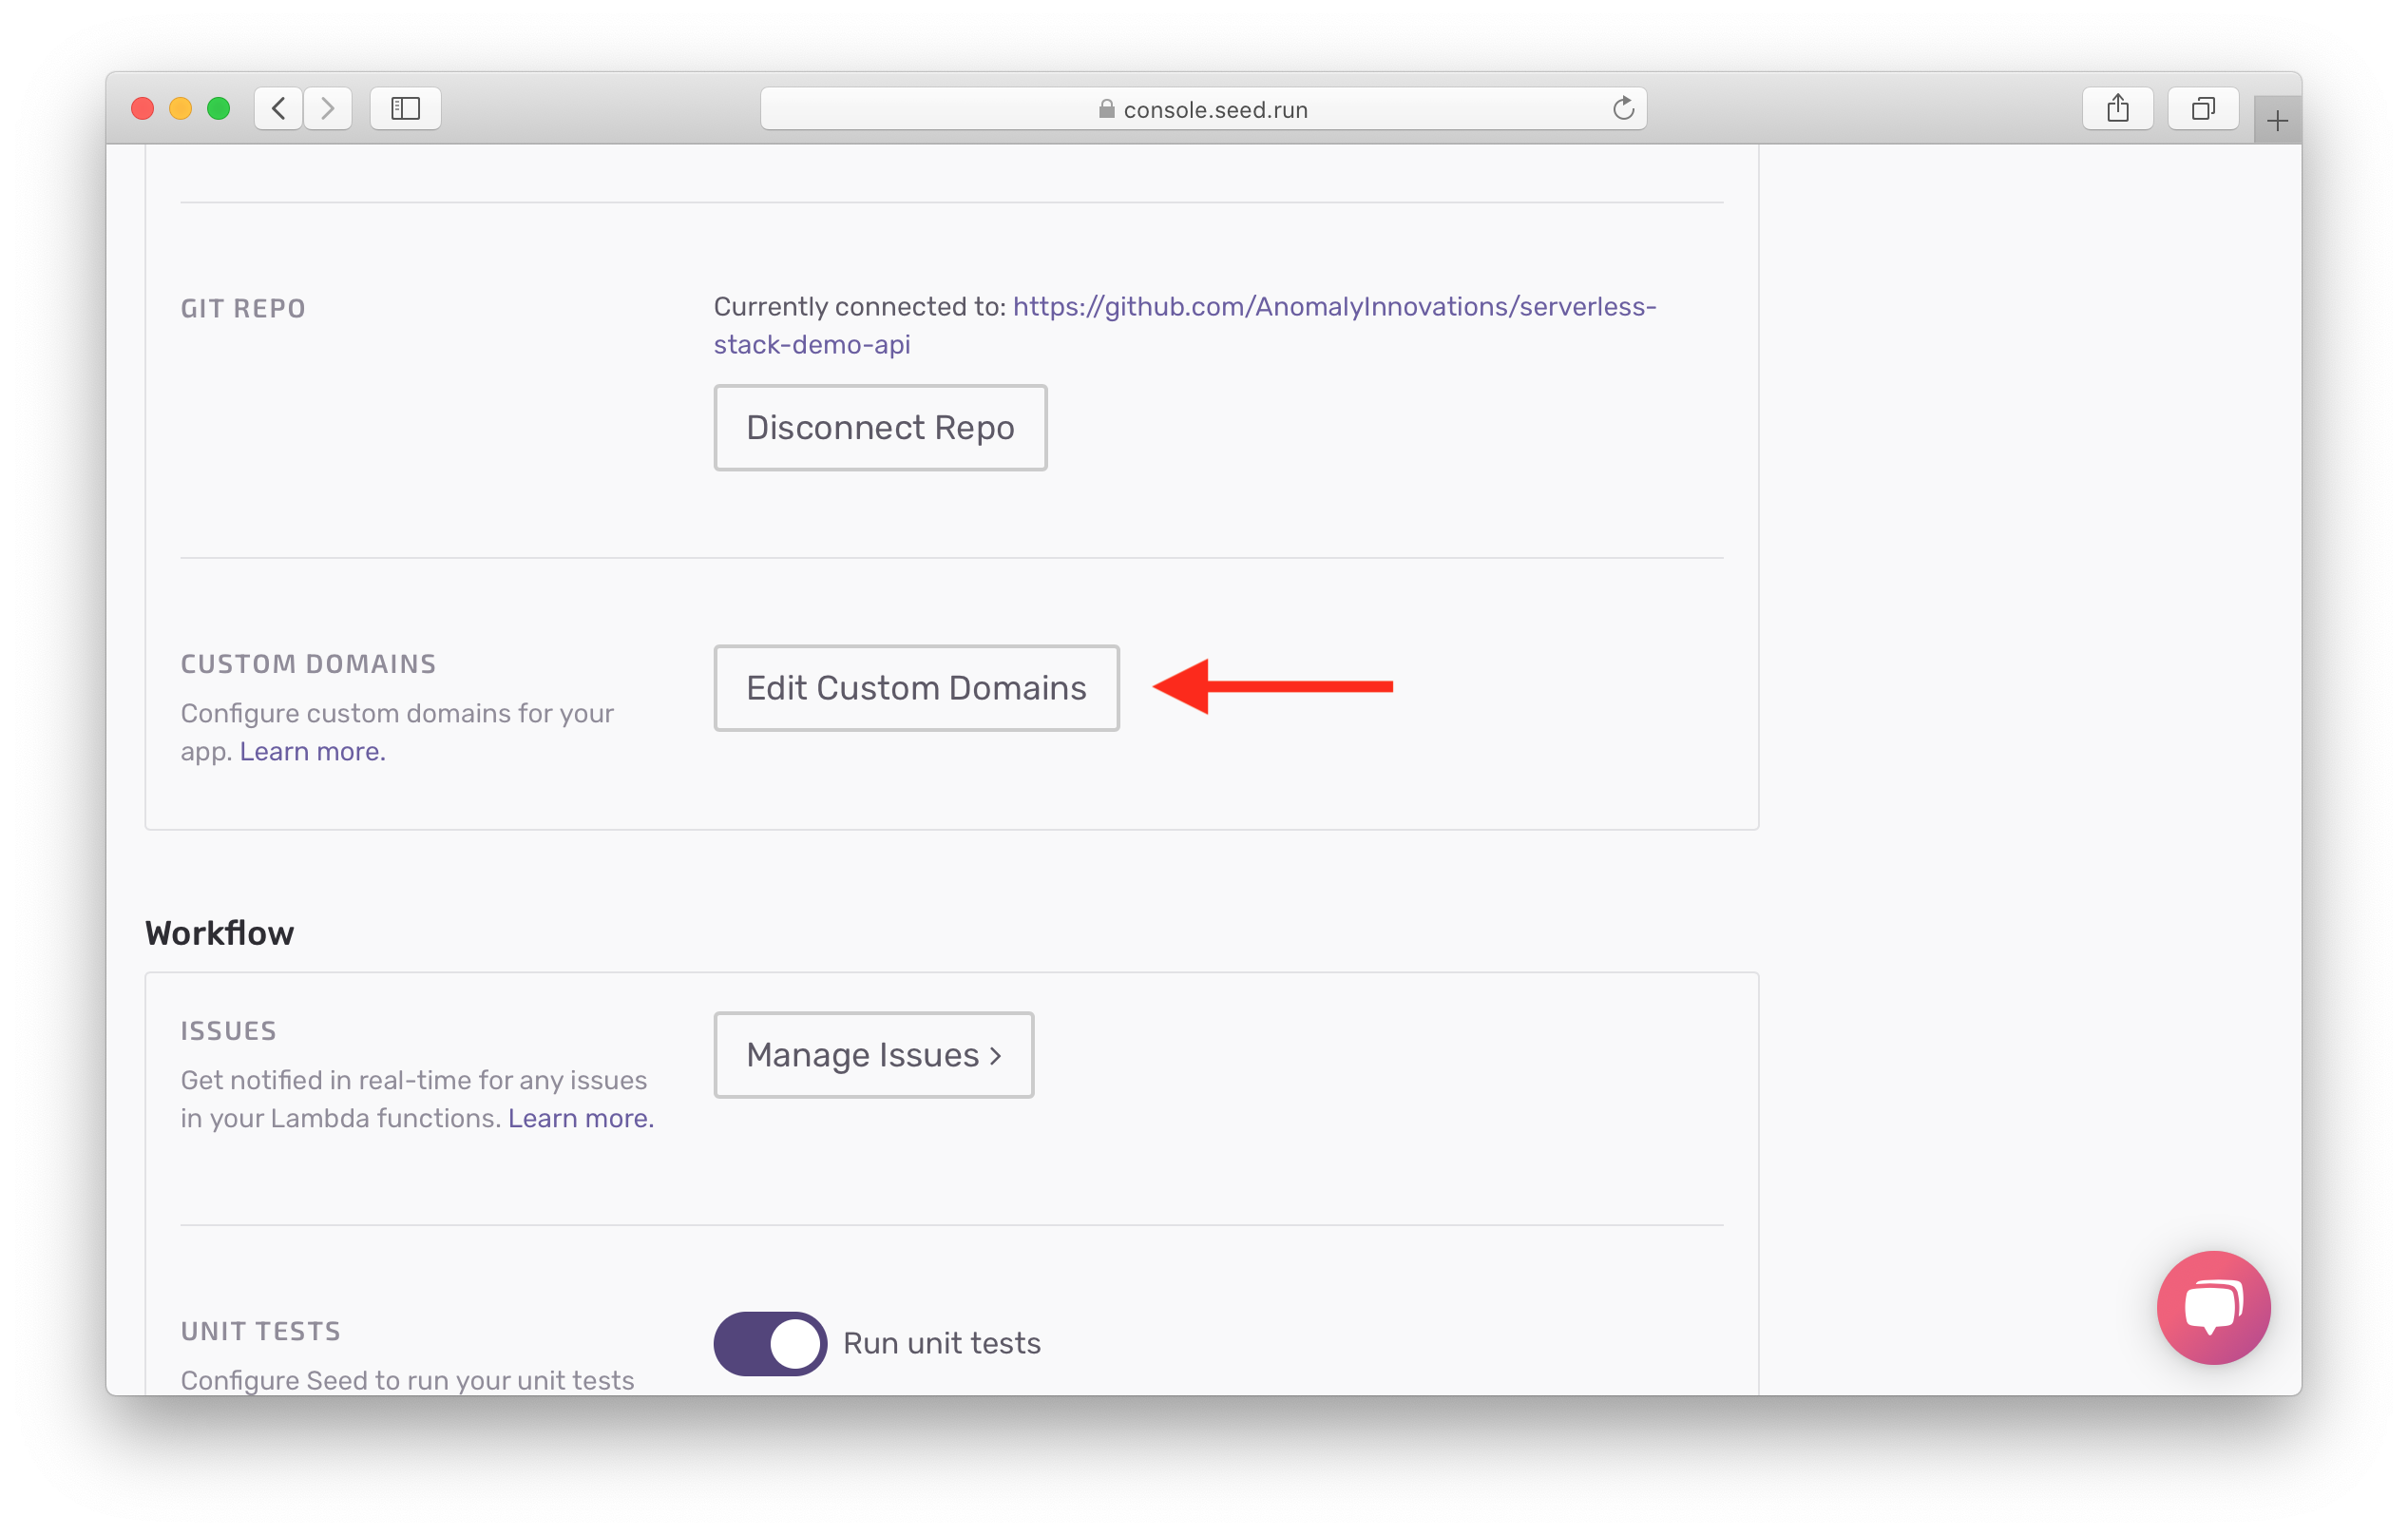
Here click on Edit Custom Domains.
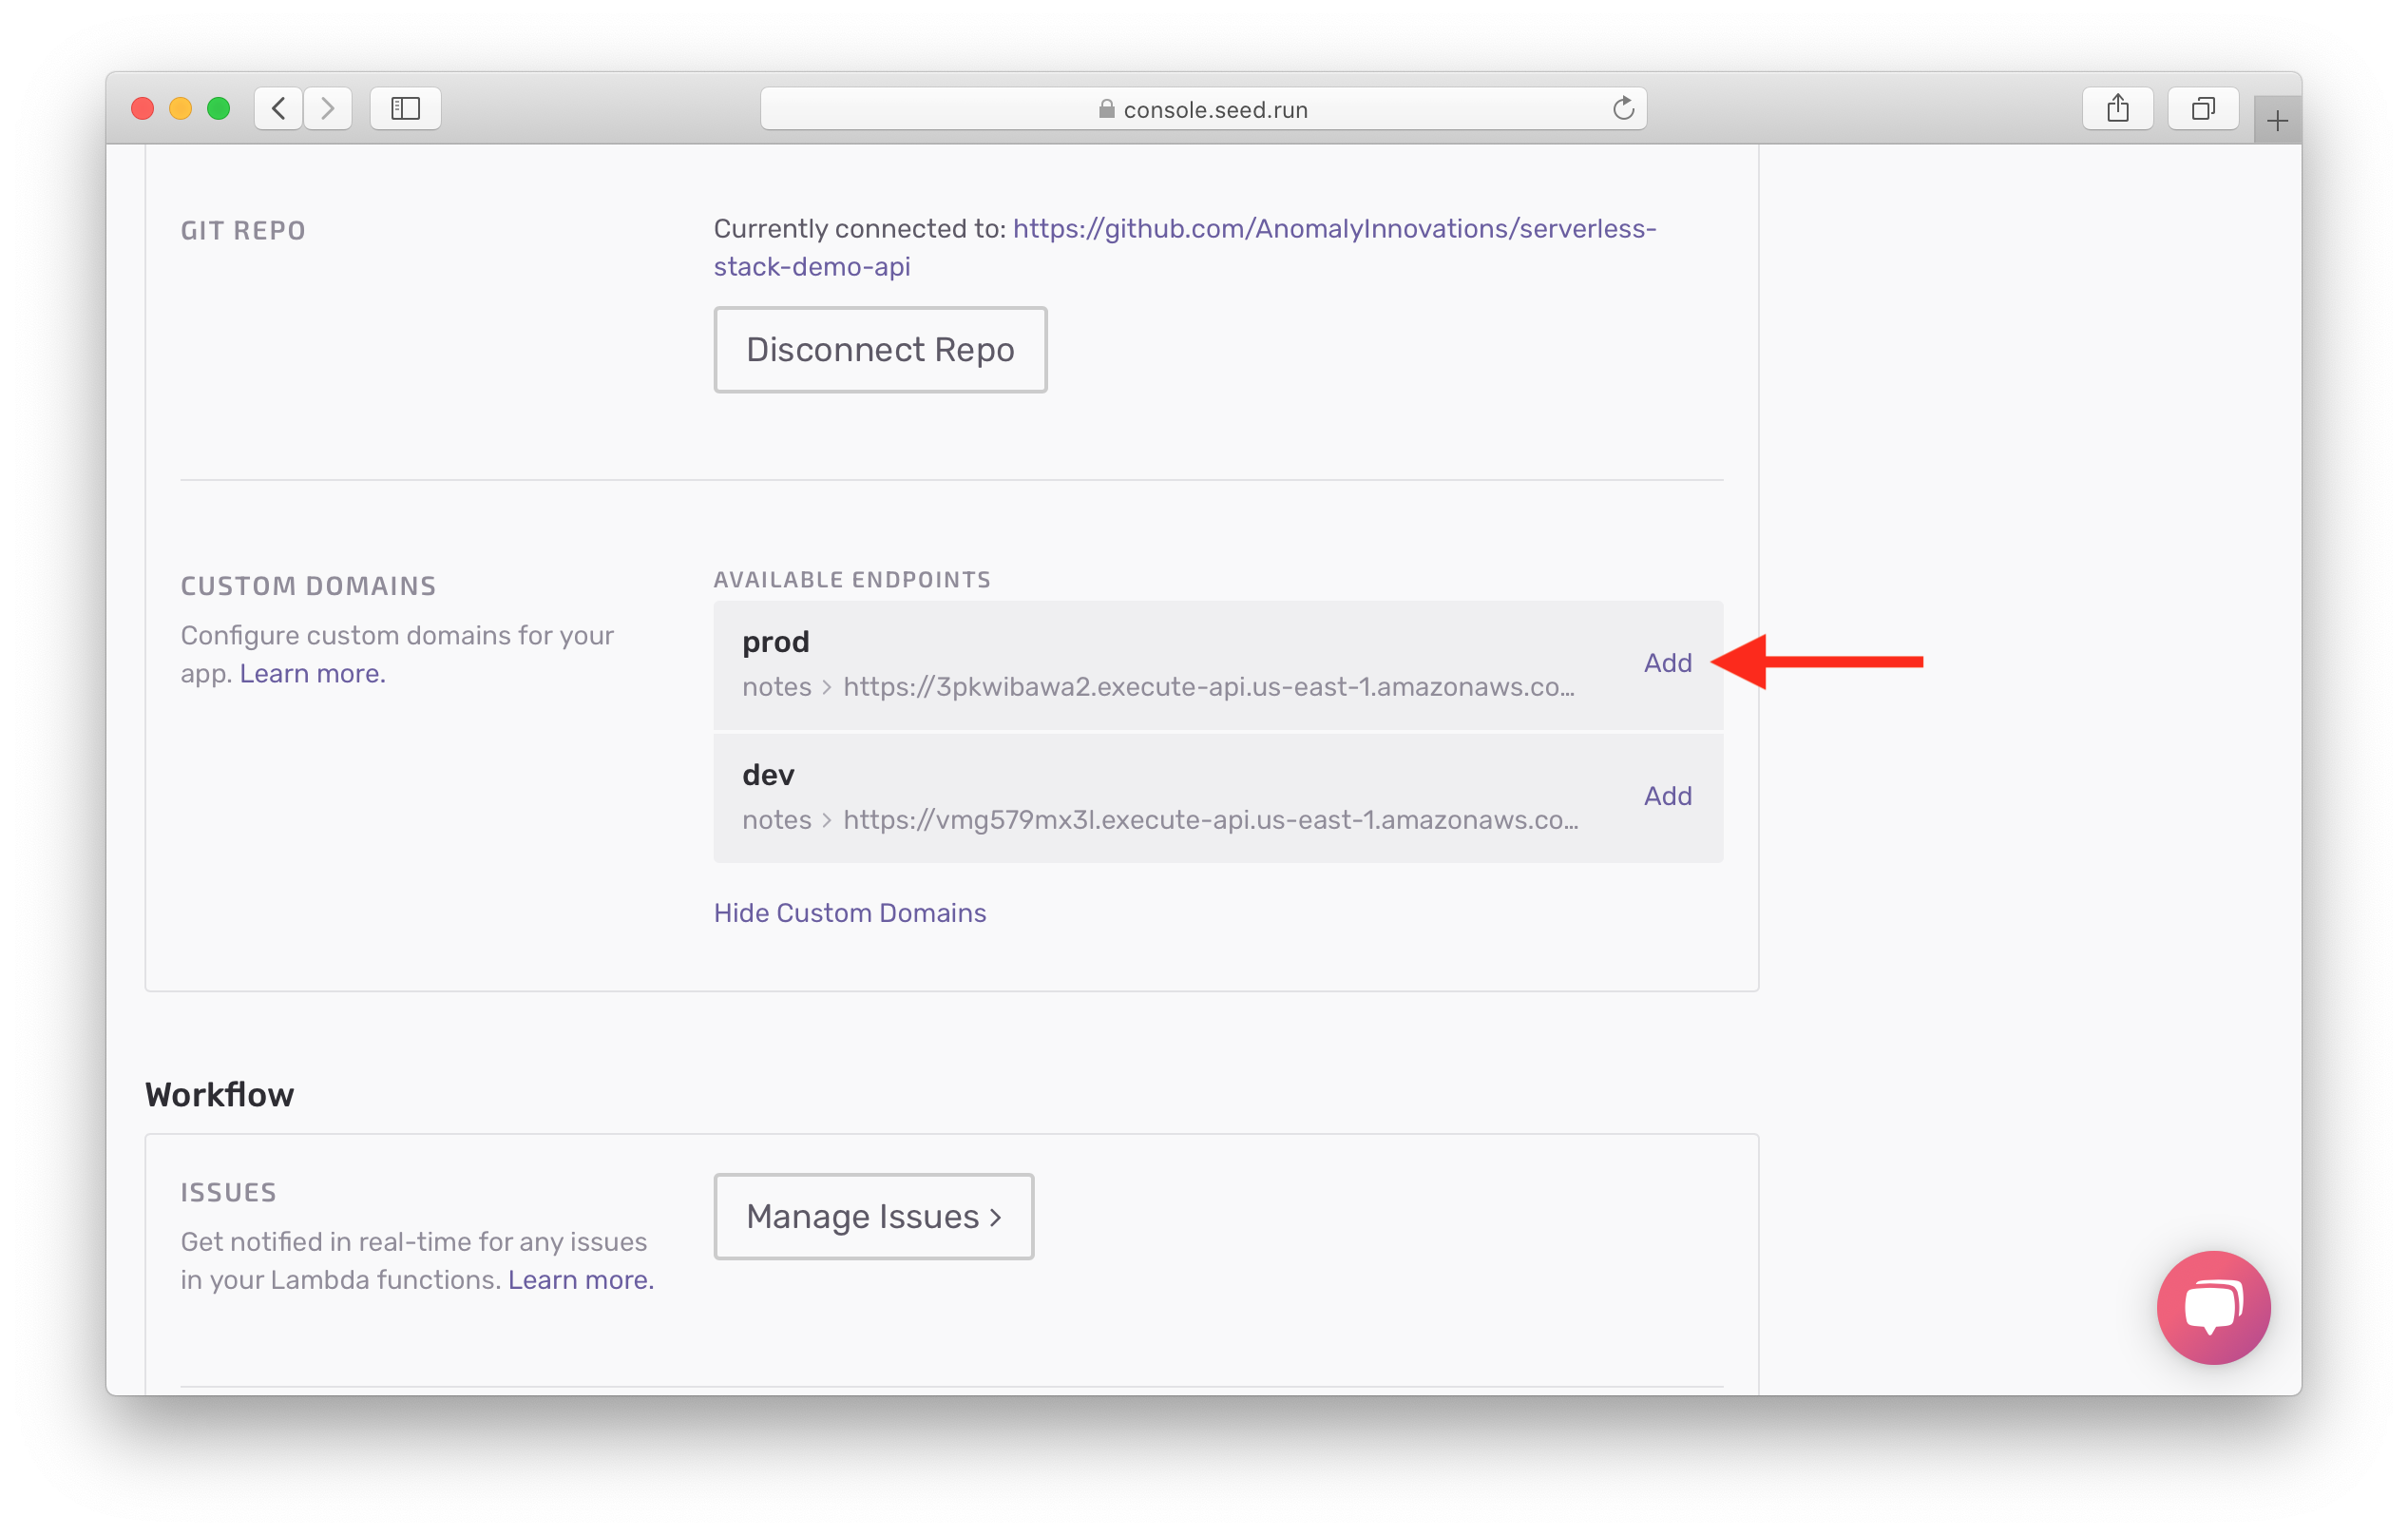
And click Add for our production endpoint.
Seed will pull up any domains you have configured in Route 53.
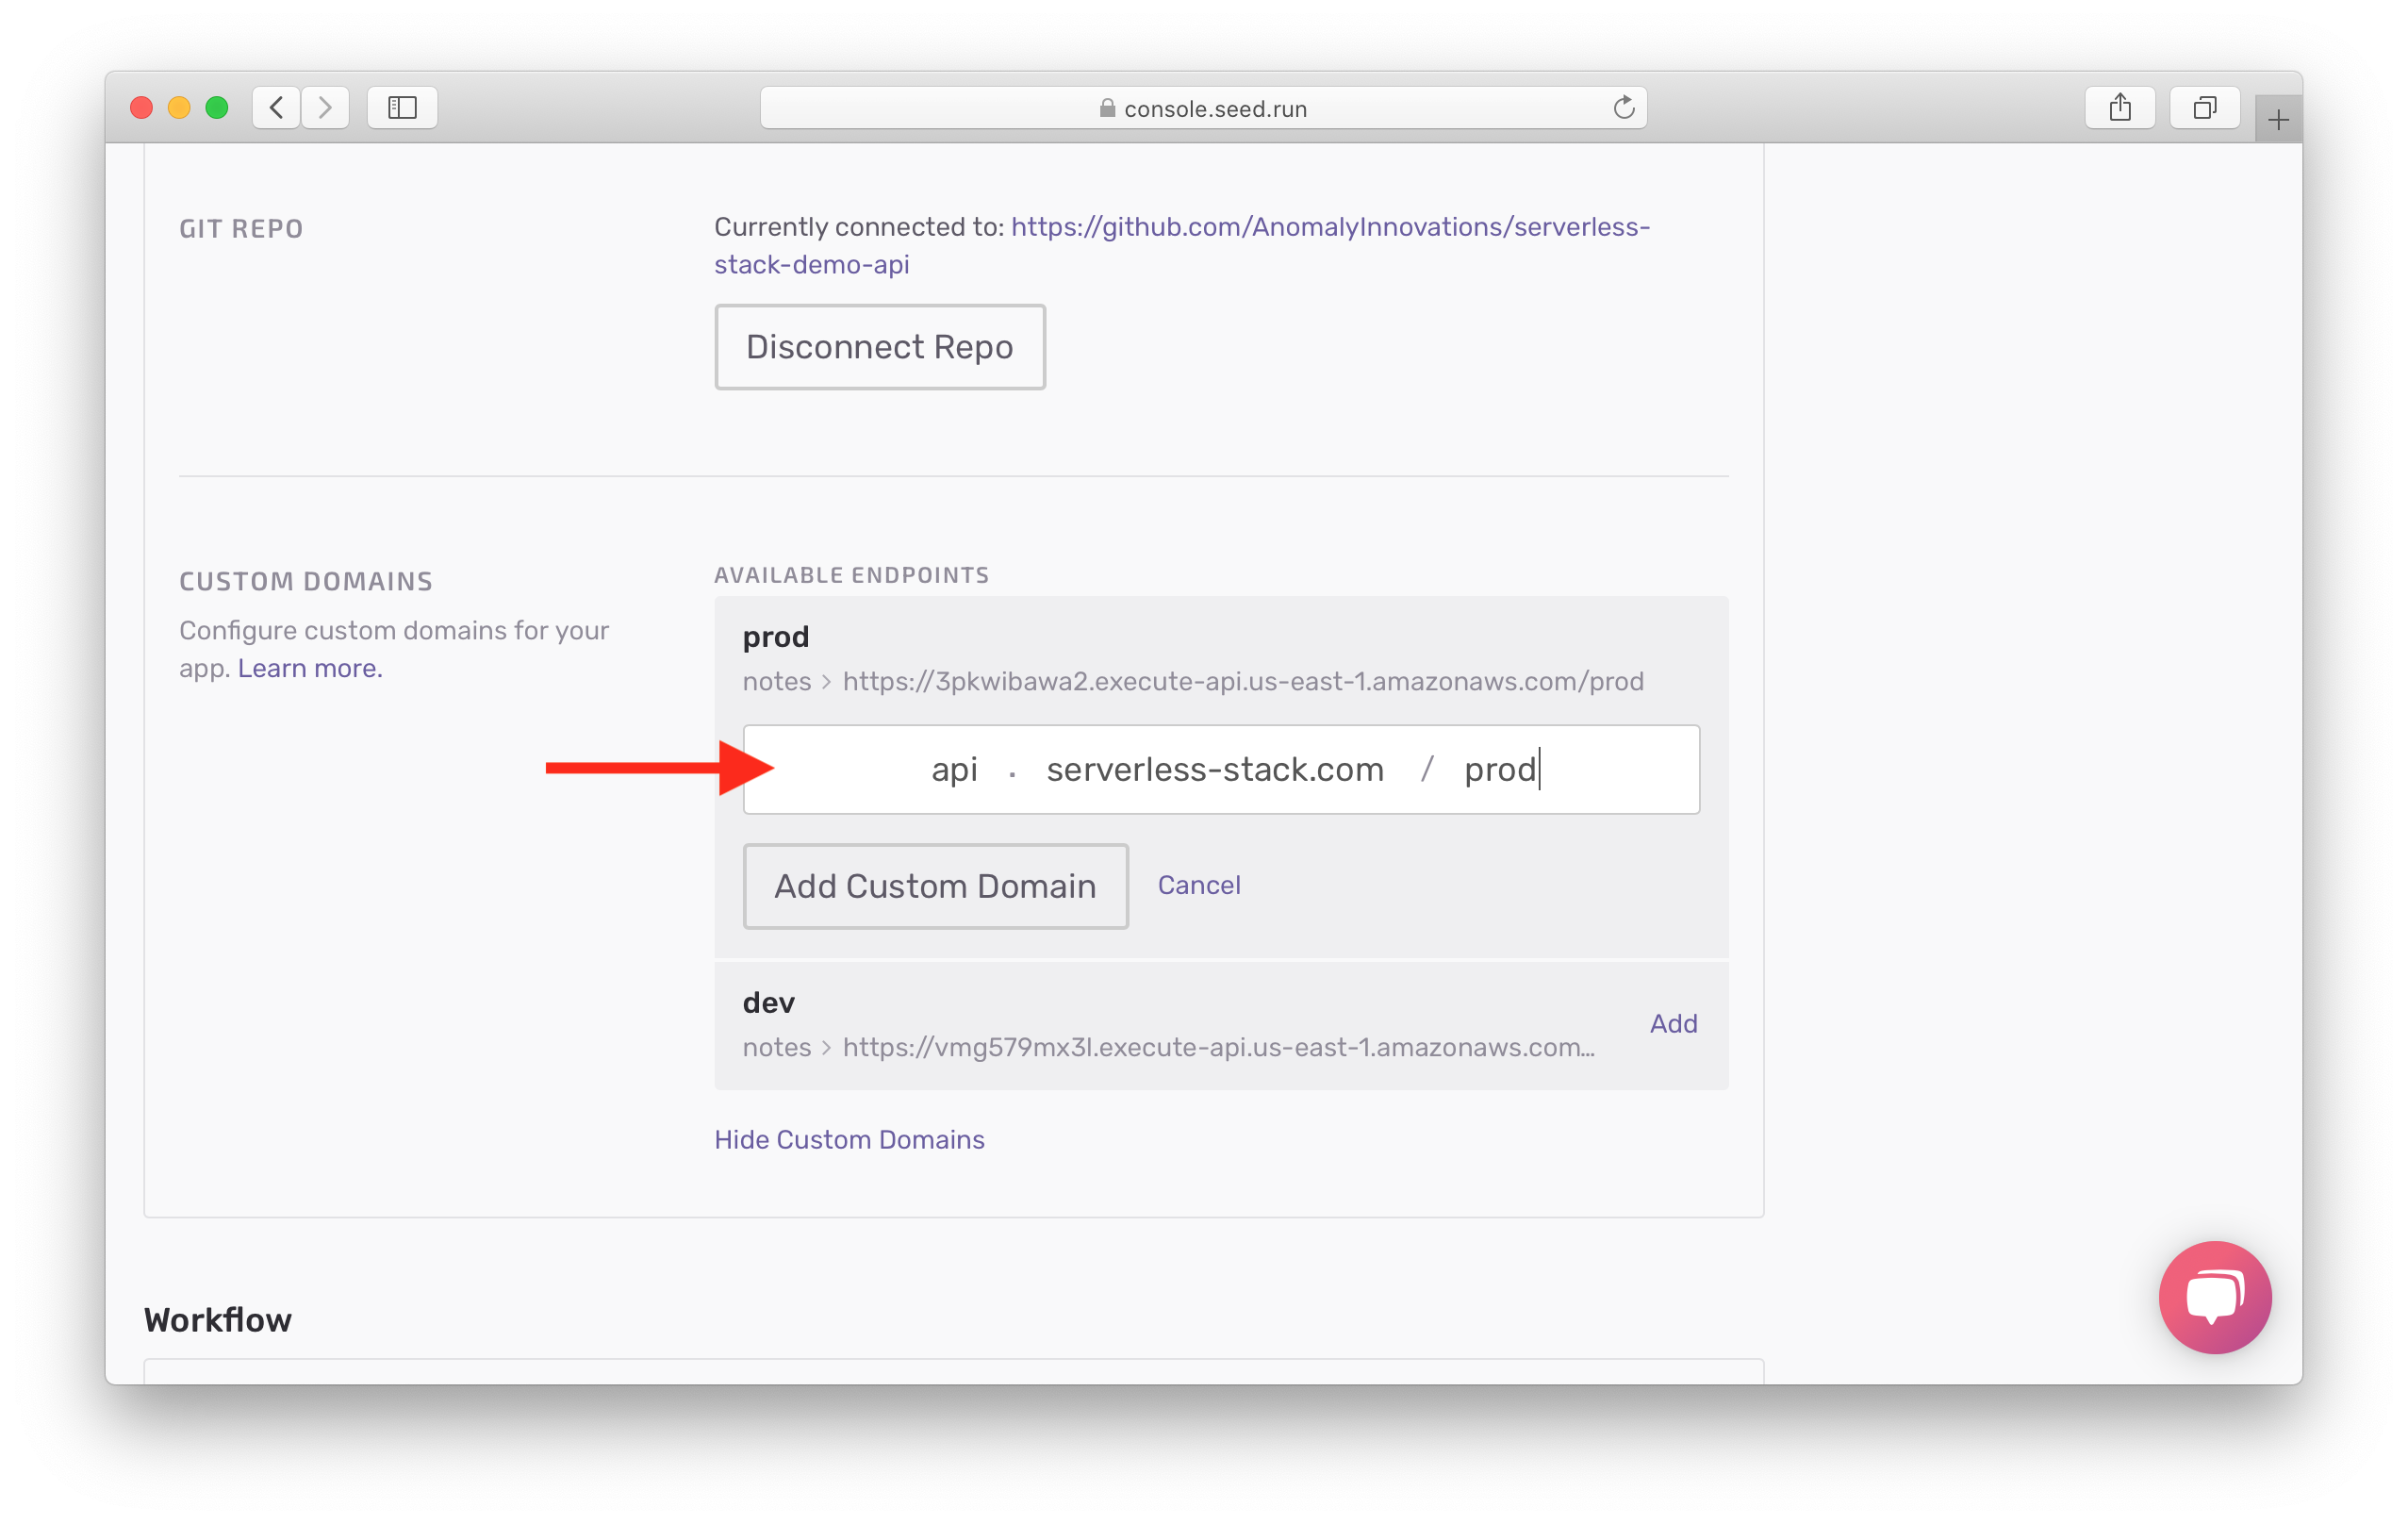
Hit Select a domain and you should see a list of all your Route 53 domains. Select the one you intend to use. And fill in the sub-domain and base path. For example, you could use api.my-domain.com/prod; where api is the sub-domain and prod is the base path.
And hit Add Custom Domain.
Seed will now go through and configure the domain for this API Gateway endpoint, create the SSL certificate and attach it to the domain. This process can take up to 40 mins.
While we wait, we can do the same for our dev endpoint. Select the domain, sub-domain, and base path. In our case we’ll use something like api.my-domain.com/dev.

Hit Add Custom Domain and wait for the changes to take place.
And that’s it! Now your app is configured with custom domains on Seed.
For help and discussion
Comments on this chapter