
Customize the serverless IAM Policy
Serverless Framework deploys using the policy attached to the IAM credentials in your AWS CLI profile. Back in the Create an IAM User chapter we created a user that the Serverless Framework will use to deploy our project. This user was assigned AdministratorAccess. This means that Serverless Framework and your project has complete access to your AWS account. This is fine in trusted environments but if you are working as a part of a team you might want to fine-tune the level of access based on who is using your project.
In this chapter we will take a look at how to customize the IAM Policy that Serverless Framework is going to use.
The permissions required can be categorized into the following areas:
- Permissions required by Serverless Framework
- Permissions required by your Serverless Framework plugins
- Permissions required by your Lambda code
Granting AdministratorAccess policy ensures that your project will always have the necessary permissions. But if you want to create an IAM policy that grants the minimal set of permissions, you need to customize your IAM policy.
A basic serverless project needs permissions to the following AWS services:
- CloudFormation to create change set and update stack
- S3 to upload and store serverless artifacts and Lambda source code
- CloudWatch Logs to store Lambda execution logs
- IAM to manage policies for the Lambda IAM Role
- API Gateway to manage API endpoints
- Lambda to manage Lambda functions
- EC2 to execute Lambda in VPC
- CloudWatch Events to manage CloudWatch event triggers
A simple IAM Policy template
These can be defined and granted using a simple IAM policy.
{
  "Version": "2012-10-17",
  "Statement": [
    {
      "Effect": "Allow",
      "Action": [
        "cloudformation:*",
        "s3:*",
        "logs:*",
        "iam:*",
        "apigateway:*",
        "lambda:*",
        "ec2:DescribeSecurityGroups",
        "ec2:DescribeSubnets",
        "ec2:DescribeVpcs",
        "events:*"
      ],
      "Resource": [
        "*"
      ]
    }
  ]
}
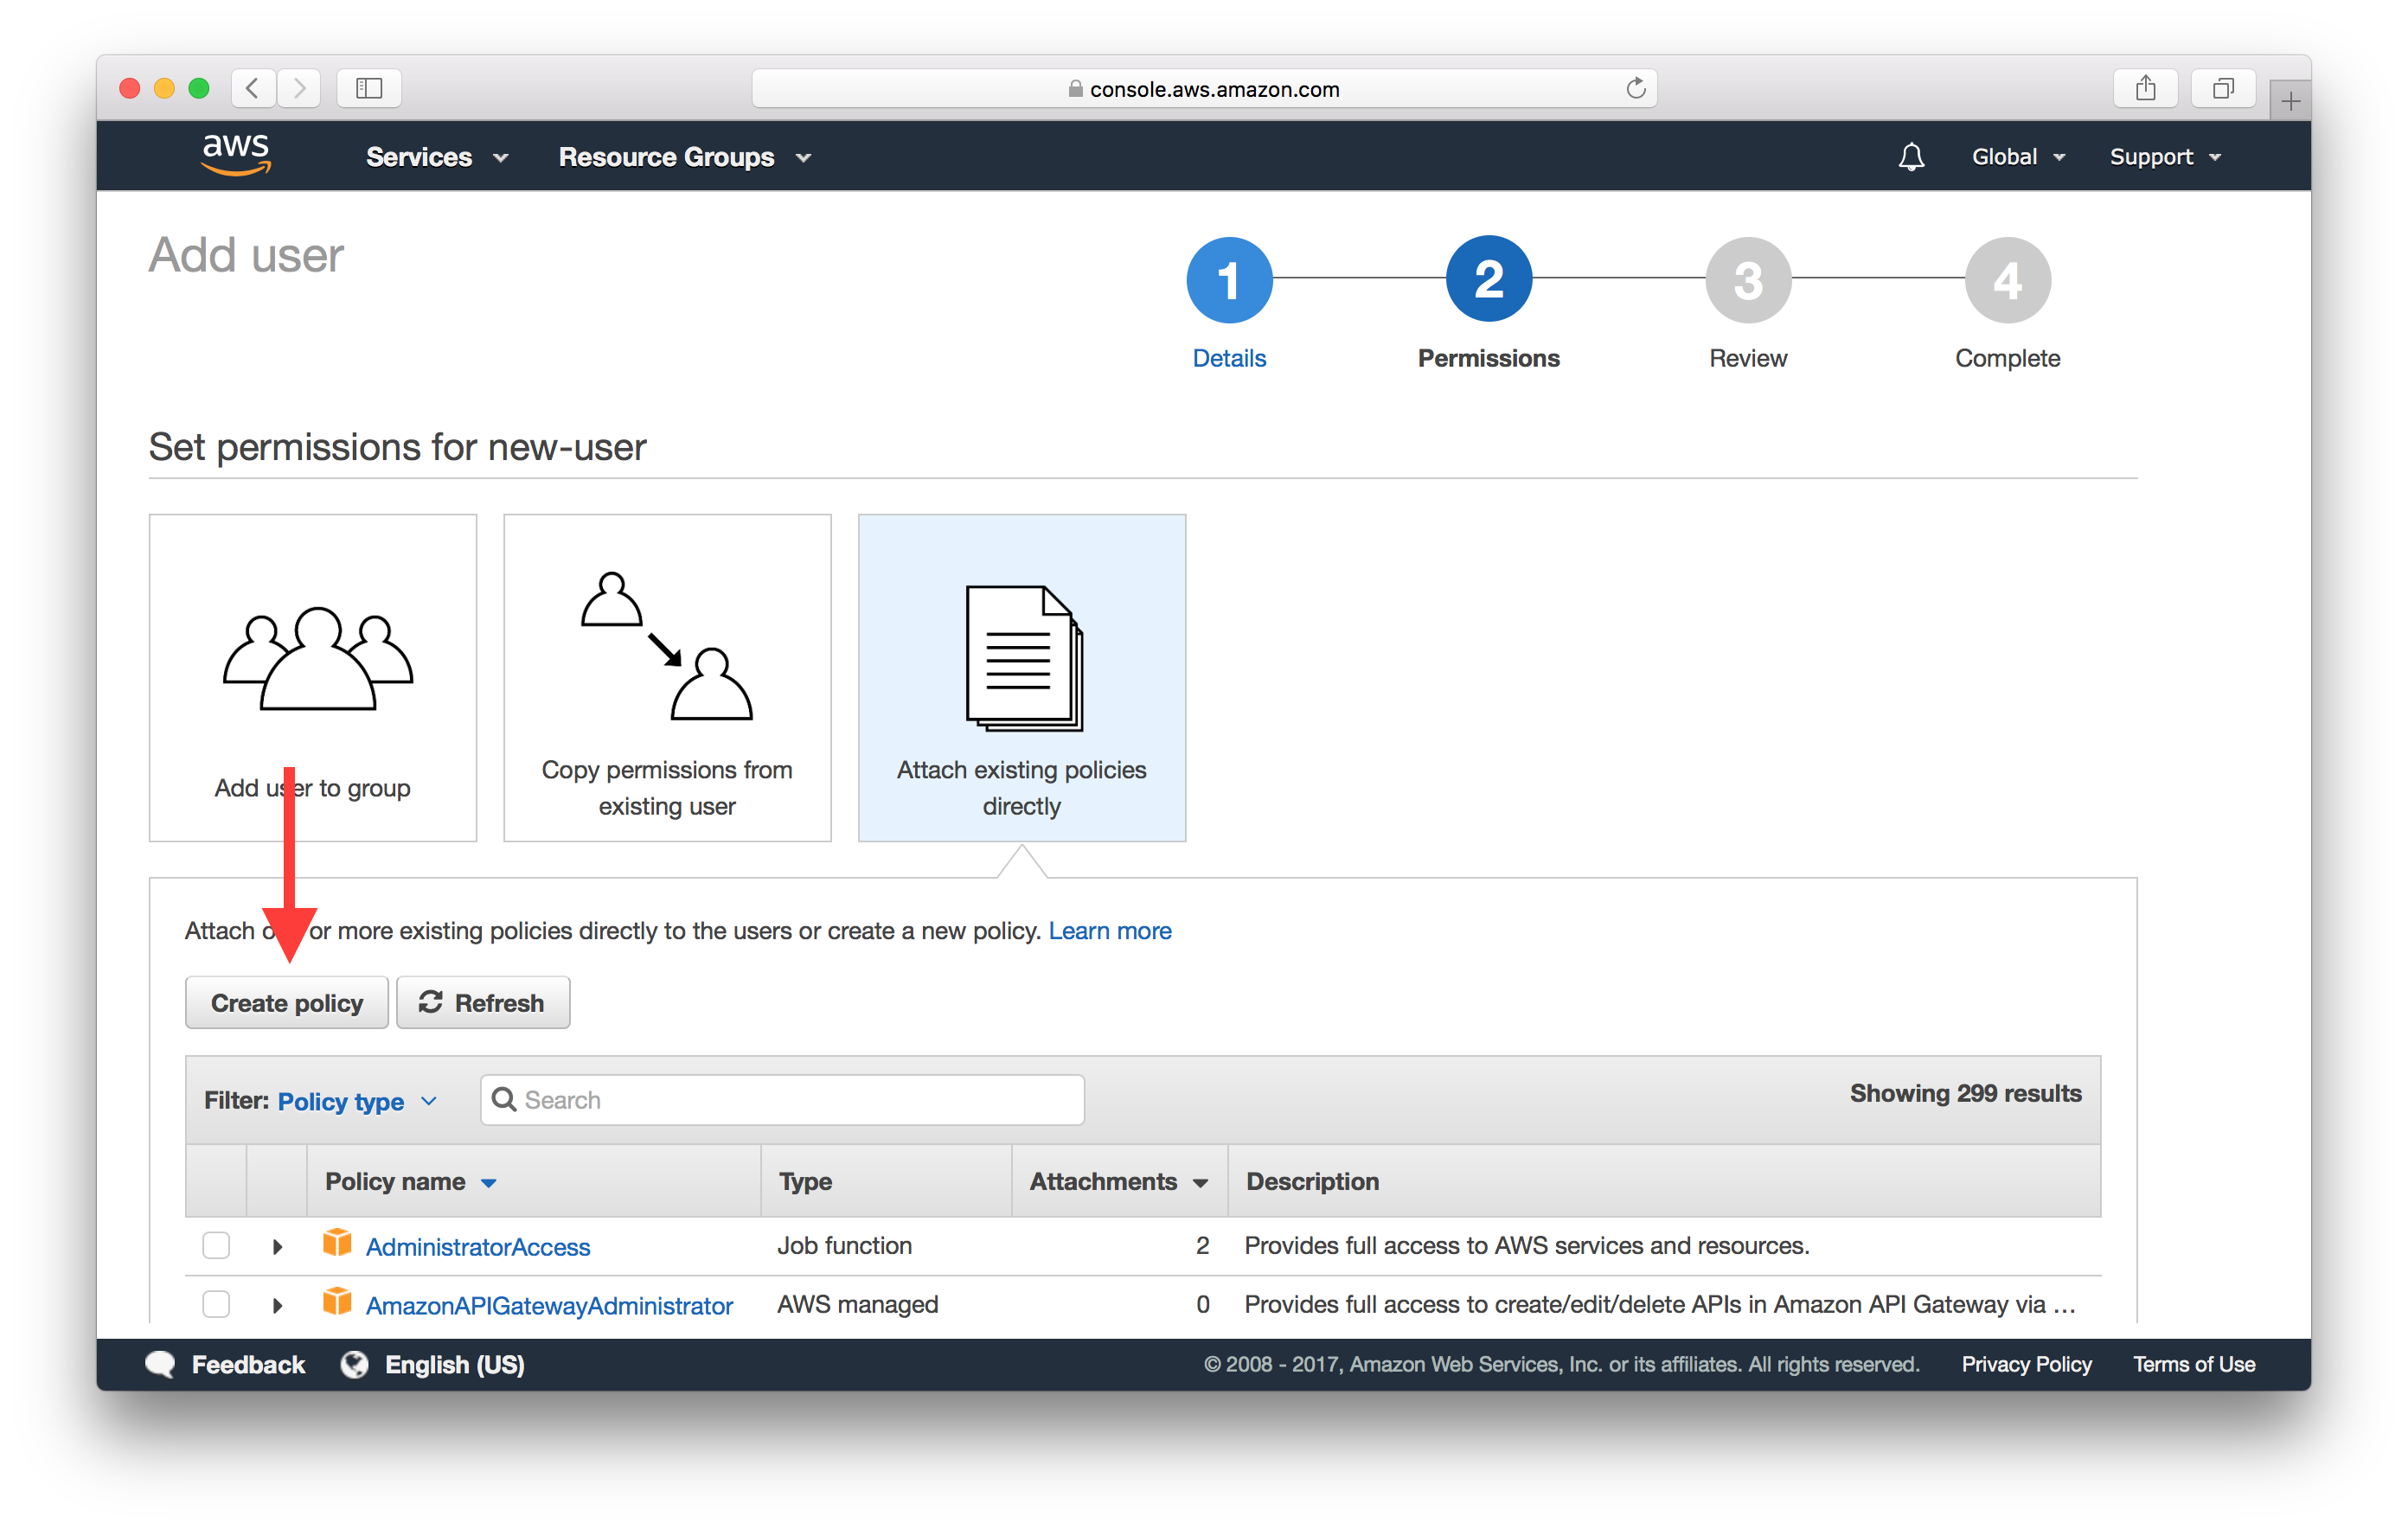
We can attach this policy to the IAM user we are creating by continuing from the Attach existing policies directly step in the Create an IAM User chapter.
Hit the Create policy button.
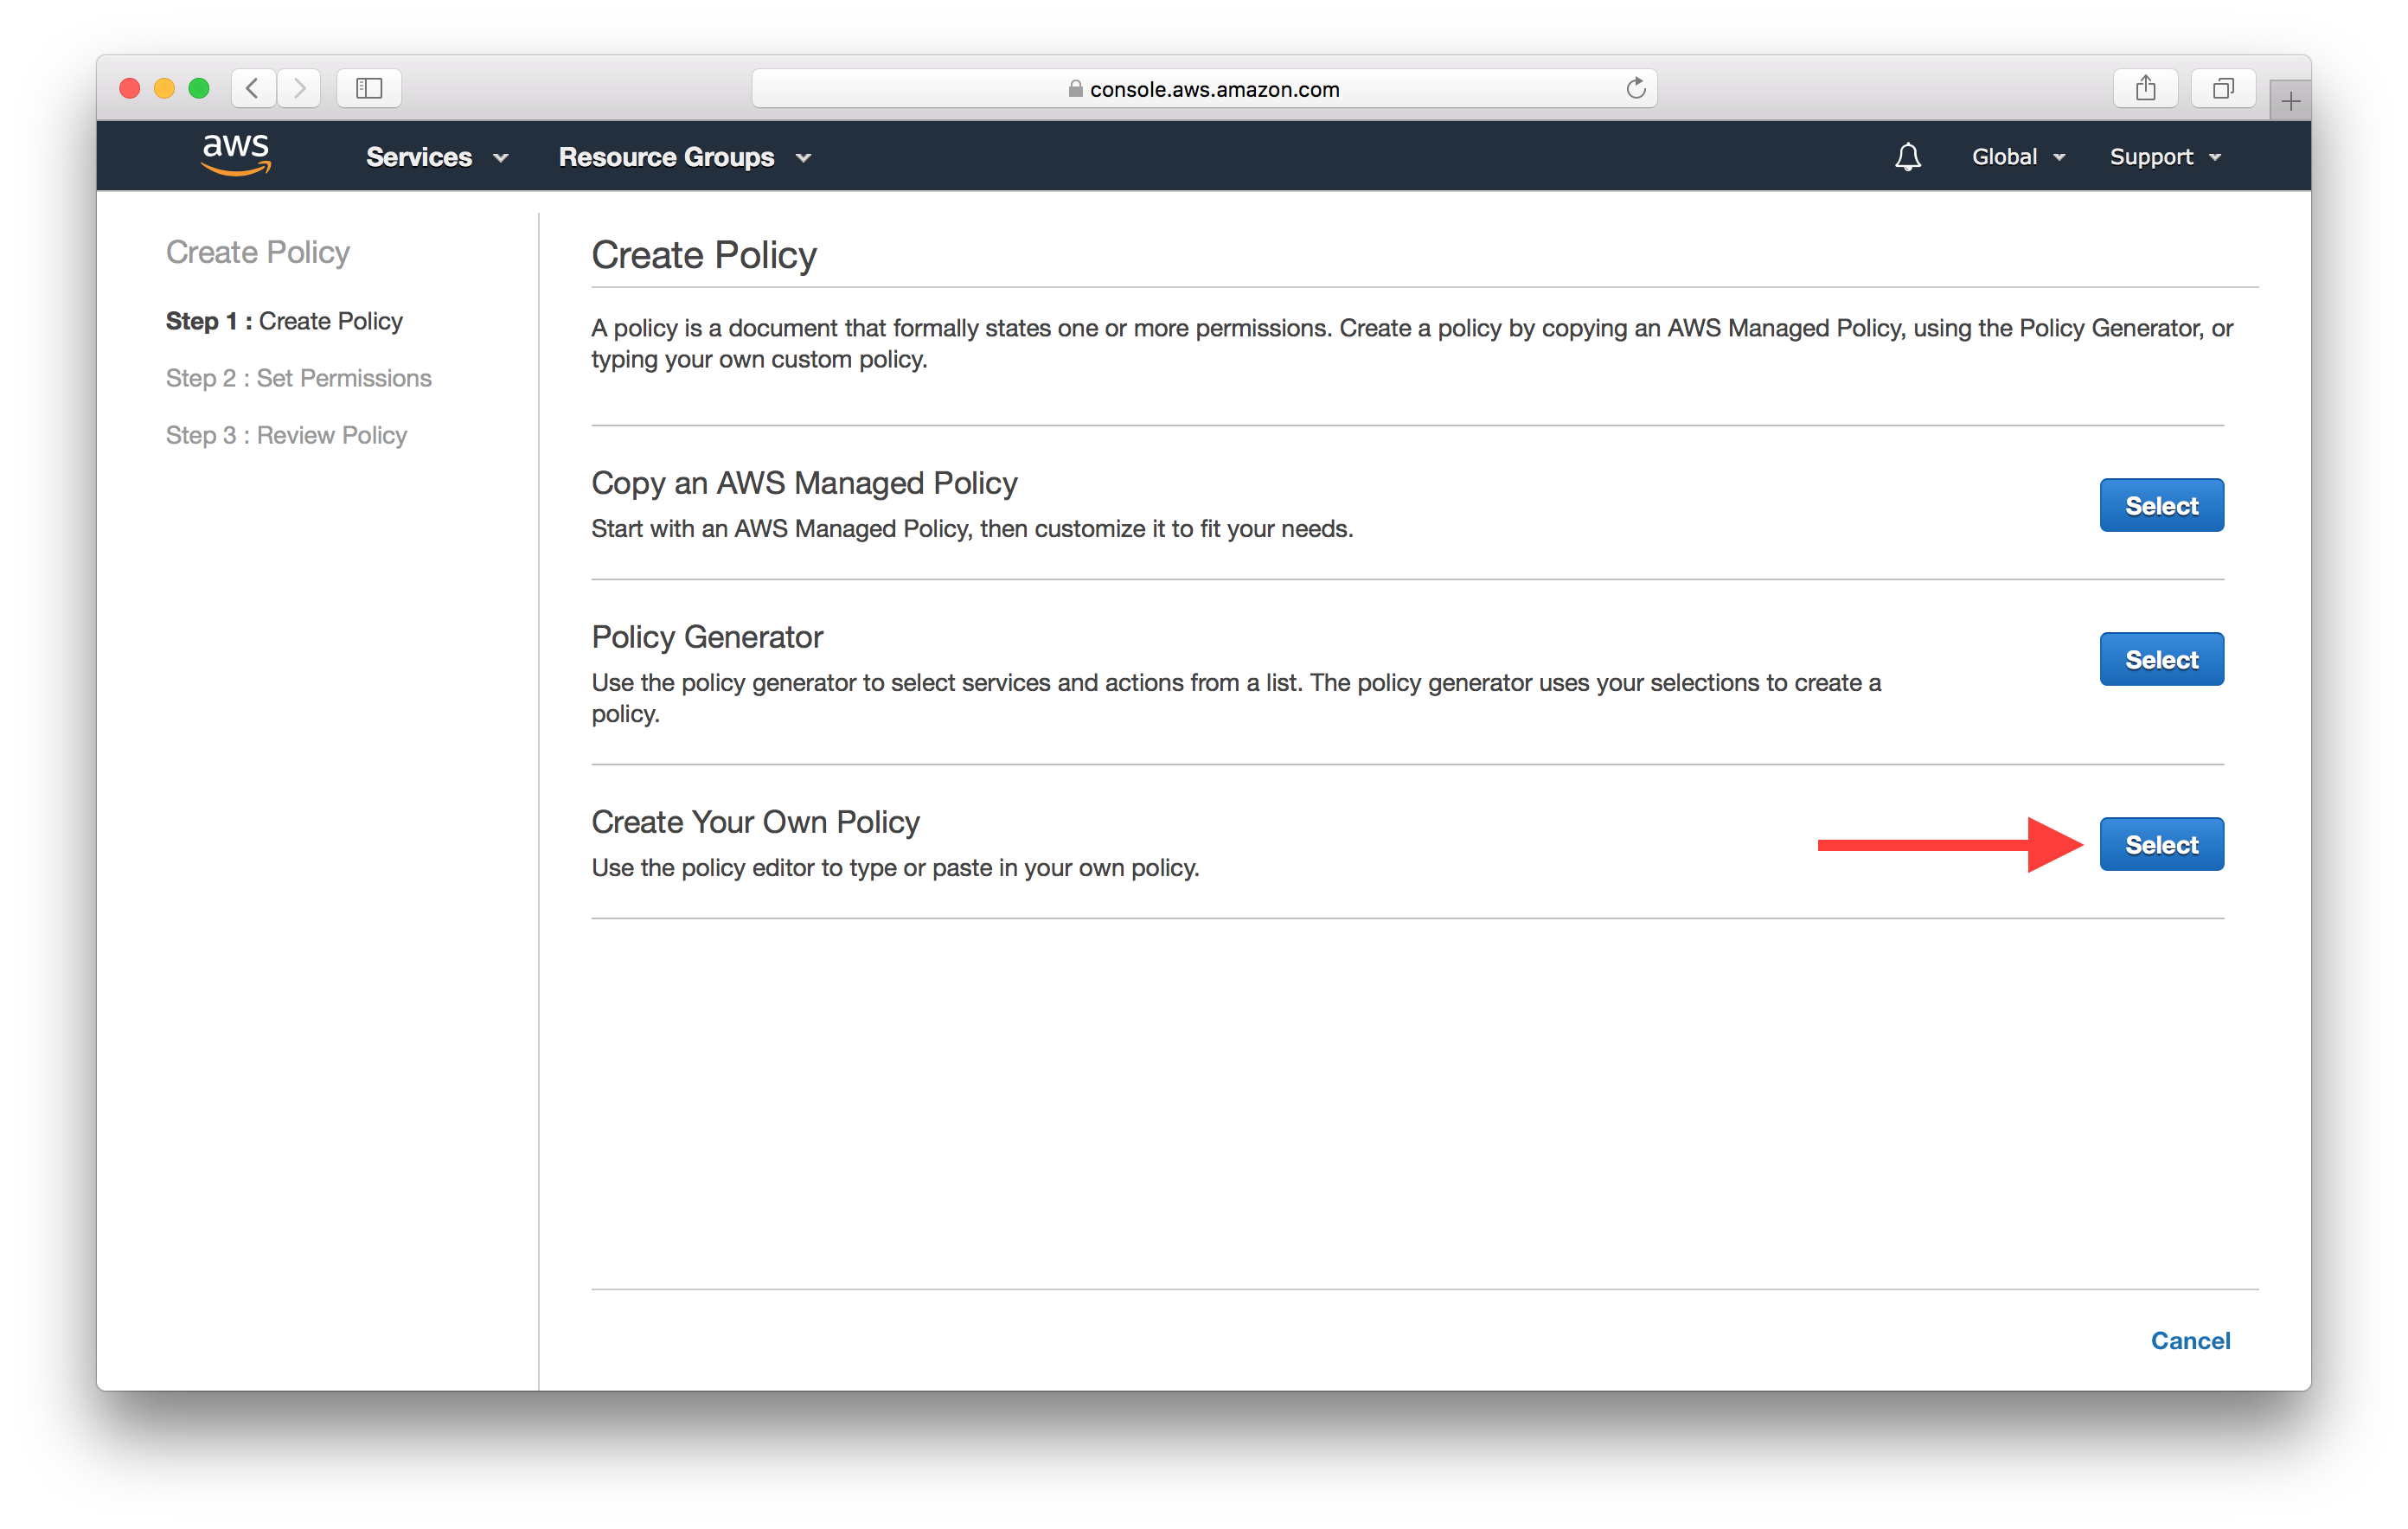
And hit Select in the Create Your Own Policy section.
Here pick a name for your new policy and paste the policy created above in the Policy Document field.
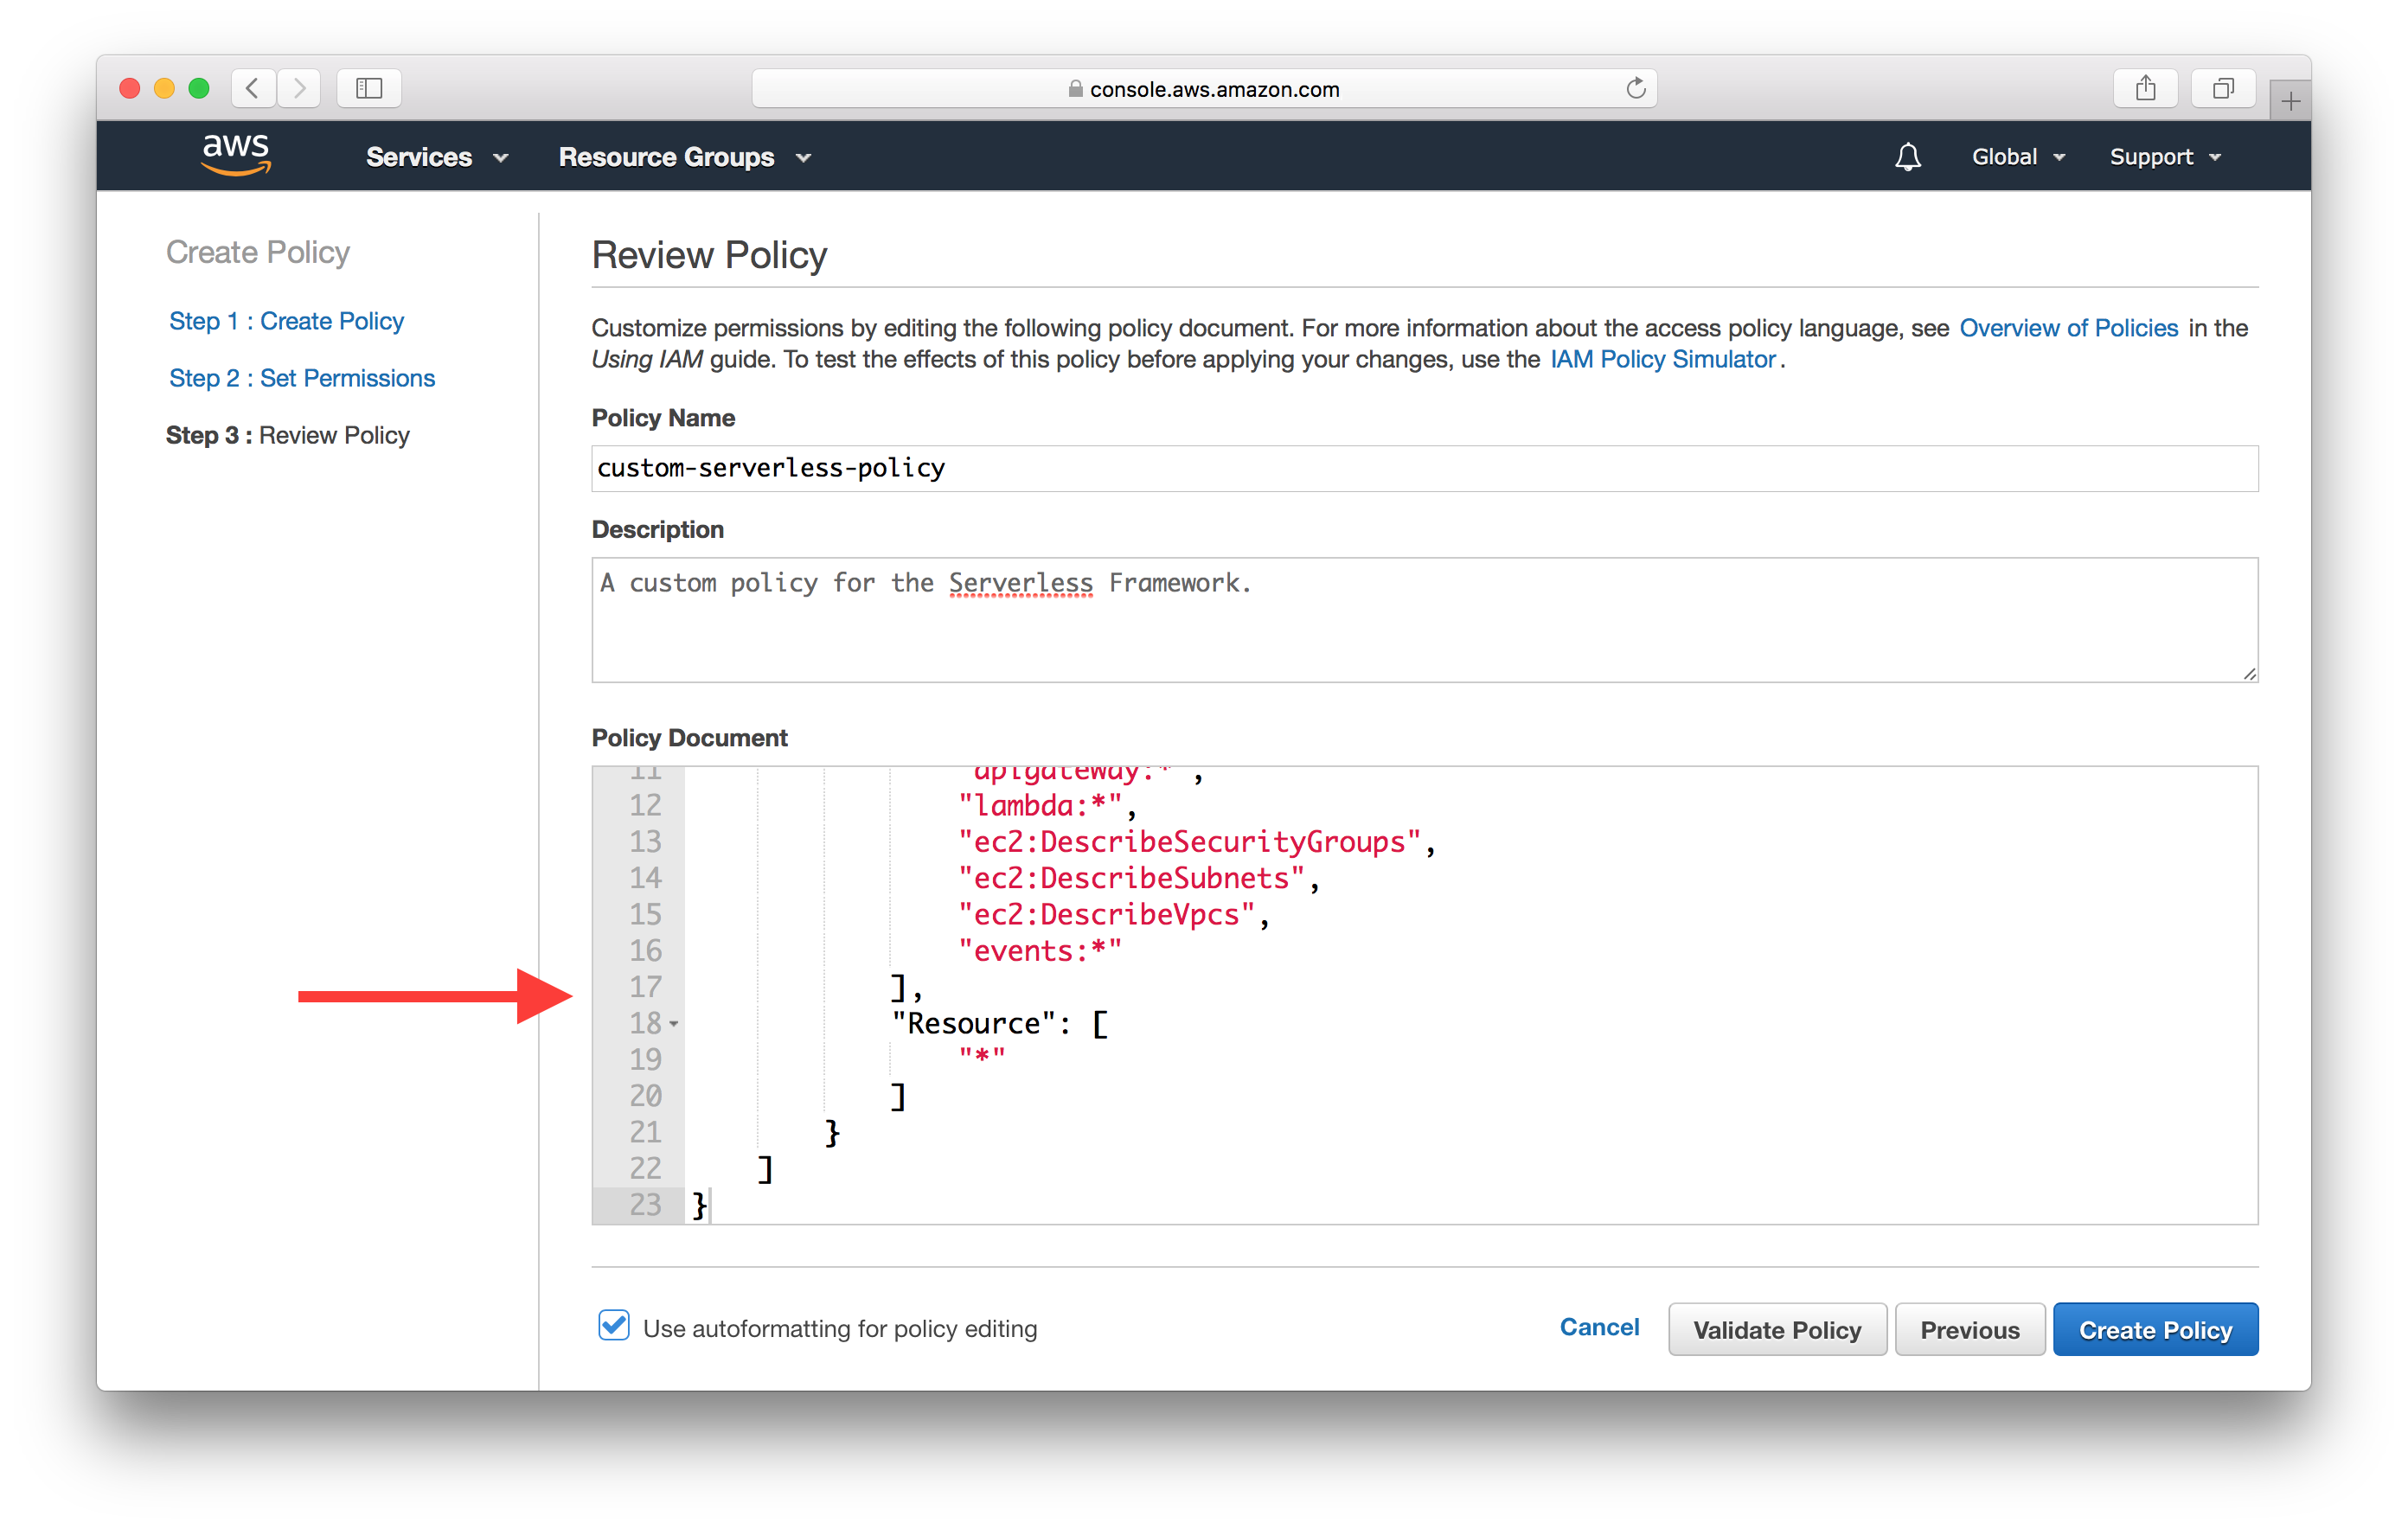
Finally, hit Create Policy. You can now chose this policy while creating your IAM user instead of the AdministratorAccess one that we had used before.
This policy grants your Serverless Framework project access to all the resources listed above. But we can narrow this down further by restricting them to specific Actions for the specific Resources in each AWS service.
An advanced IAM Policy template
Below is a more nuanced policy template that restricts access to the serverless project that is being deployed. Make sure to replace <region>, <account_no> and <service_name> for your specific project.
{
  "Version": "2012-10-17",
  "Statement": [
    {
      "Effect": "Allow",
      "Action": [
        "cloudformation:Describe*",
        "cloudformation:List*",
        "cloudformation:Get*",
        "cloudformation:CreateStack",
        "cloudformation:UpdateStack",
        "cloudformation:DeleteStack"
      ],
      "Resource": "arn:aws:cloudformation:<region>:<account_no>:stack/<service_name>*/*"
    },
    {
      "Effect": "Allow",
      "Action": [
        "cloudformation:ValidateTemplate"
      ],
      "Resource": "*"
    },
    {
      "Effect": "Allow",
      "Action": [
        "s3:CreateBucket",
        "s3:DeleteBucket",
        "s3:Get*",
        "s3:List*"
      ],
      "Resource": [
        "arn:aws:s3:::<service_name>*"
      ]
    },
    {
      "Effect": "Allow",
      "Action": [
        "s3:*"
      ],
      "Resource": [
        "arn:aws:s3:::<service_name>*/*"
      ]
    },
    {
      "Effect": "Allow",
      "Action": [
        "logs:DescribeLogGroups"
      ],
      "Resource": "arn:aws:logs:<region>:<account_no>:log-group::log-stream:*"
    },
    {
      "Action": [
        "logs:CreateLogGroup",
        "logs:CreateLogStream",
        "logs:DeleteLogGroup",
        "logs:DeleteLogStream",
        "logs:DescribeLogStreams",
        "logs:FilterLogEvents"
      ],
      "Resource": "arn:aws:logs:<region>:<account_no>:log-group:/aws/lambda/<service_name>*:log-stream:*",
      "Effect": "Allow"
    },
    {
      "Effect": "Allow",
      "Action": [
        "iam:GetRole",
        "iam:PassRole",
        "iam:CreateRole",
        "iam:DeleteRole",
        "iam:DetachRolePolicy",
        "iam:PutRolePolicy",
        "iam:AttachRolePolicy",
        "iam:DeleteRolePolicy"
      ],
      "Resource": [
        "arn:aws:iam::<account_no>:role/<service_name>*-lambdaRole"
      ]
    },
    {
      "Effect": "Allow",
      "Action": [
        "apigateway:GET",
        "apigateway:PATCH",
        "apigateway:POST",
        "apigateway:PUT",
        "apigateway:DELETE"
      ],
      "Resource": [
        "arn:aws:apigateway:<region>::/restapis"
      ]
    },
    {
      "Effect": "Allow",
      "Action": [
        "apigateway:GET",
        "apigateway:PATCH",
        "apigateway:POST",
        "apigateway:PUT",
        "apigateway:DELETE"
      ],
      "Resource": [
        "arn:aws:apigateway:<region>::/restapis/*"
      ]
    },
    {
      "Effect": "Allow",
      "Action": [
        "lambda:GetFunction",
        "lambda:CreateFunction",
        "lambda:DeleteFunction",
        "lambda:UpdateFunctionConfiguration",
        "lambda:UpdateFunctionCode",
        "lambda:ListVersionsByFunction",
        "lambda:PublishVersion",
        "lambda:CreateAlias",
        "lambda:DeleteAlias",
        "lambda:UpdateAlias",
        "lambda:GetFunctionConfiguration",
        "lambda:AddPermission",
        "lambda:RemovePermission",
        "lambda:InvokeFunction"
      ],
      "Resource": [
        "arn:aws:lambda:*:<account_no>:function:<service_name>*"
      ]
    },
    {
      "Effect": "Allow",
      "Action": [
        "ec2:DescribeSecurityGroups",
        "ec2:DescribeSubnets",
        "ec2:DescribeVpcs"
      ],
      "Resource": [
        "*"
      ]
    },
    {
      "Effect": "Allow",
      "Action": [
        "events:Put*",
        "events:Remove*",
        "events:Delete*",
        "events:Describe*"
      ],
      "Resource": "arn:aws:events::<account_no>:rule/<service_name>*"
    }
  ]
}
The <account_no> is your AWS Account ID and you can follow these instructions to look it up.
Also, recall that the <region> and <service_name> are defined in your serverless.yml like so.
service: my-service

provider:
  name: aws
  region: us-east-1
In the above serverless.yml, the <region> is us-east-1 and the <service_name> is my-service.
The above IAM policy template restricts access to the AWS services based on the name of your serverless project and the region it is deployed in.
It provides sufficient permissions for a minimal Serverless Framework project. However, if you provision any additional resources in your serverless.yml, or install Serverless plugins, or invoke any AWS APIs in your application code; you would need to update the IAM policy to accommodate for those changes. If you are looking for details on where this policy comes from; here is an in-depth discussion on the minimal Serverless IAM Deployment Policy required for a Serverless project.
For help and discussion
Comments on this chapter